
This page is part of the ProductContent AI guide. Start there for what the extension does, installation and the frequently asked questions.
Set up AI image generation
Moogento AI creates new product images that use your store's own product photo as a reference. It does not require a separate provider key. If you selected Use your own AI provider (advanced), assign the image_prompt and image_style_1 roles, plus image_style_2 and image_style_3 for any additional styles you use.
How to set it up
-
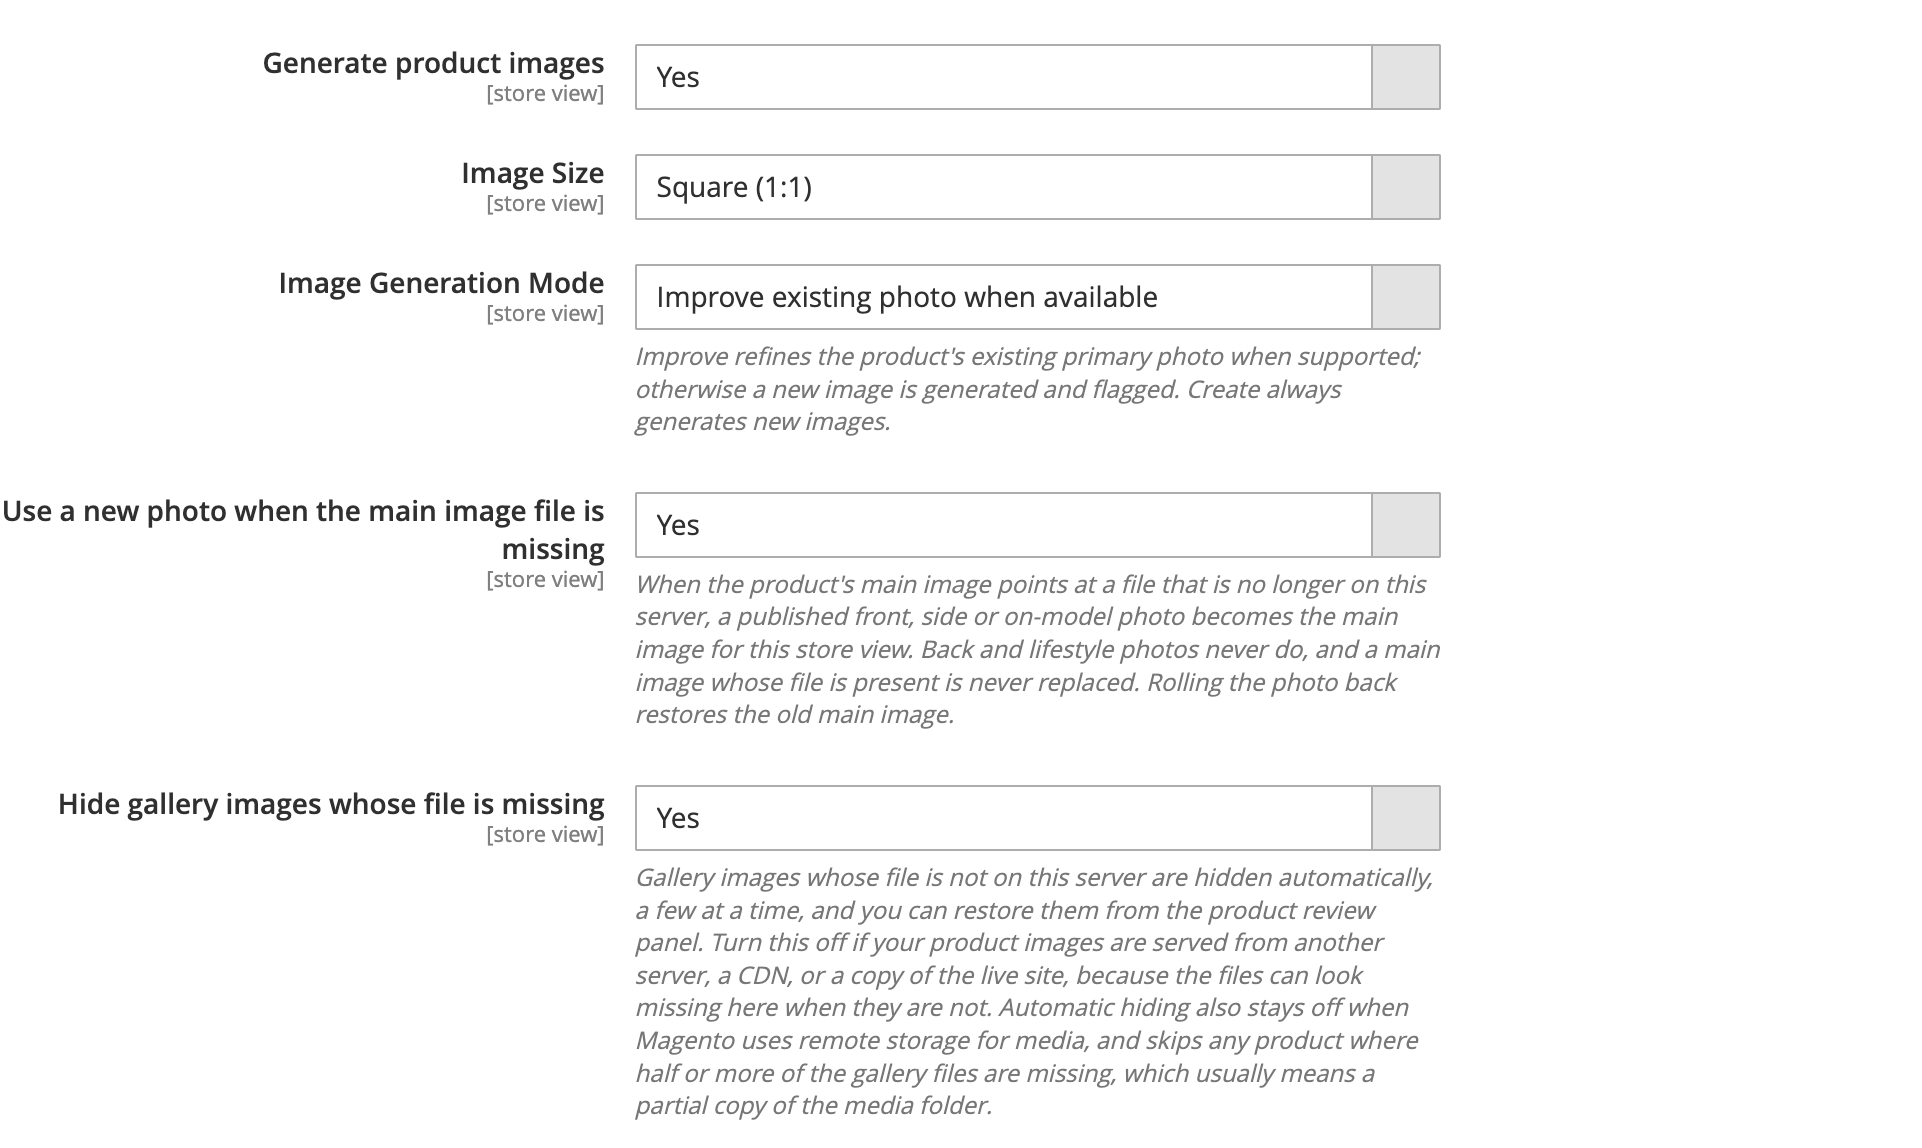
Go to: Stores > Configuration > Moogento > ProductContent AI > Content: Images & copy
-
Set:
- Generate product images (
moogento_productcontent/image_generation/enabled) =Yes - Images per Style (
moogento_productcontent/image_generation/style_count_per_job) = how many images to generate in each of the three styles per job (the combined total must be at least 1 and no more than your plan's images per product: 1 on Seed, 6 on Growth and Pro). These counts apply to legacy single-style rules. For current photo sets, choose the views and canvas in the template image rules; saved style counts do not replace the automatic view set. - Image Size (
moogento_productcontent/image_generation/image_size) = Square (1:1), Landscape (4:3 / 16:9), or Portrait (3:4 / 9:16) - Image Generation Mode (
moogento_productcontent/image_generation/generation_mode) = Improve existing photo when available (the default) or Always create a new photo - Use a new photo when the main image file is missing (
moogento_productcontent/image_generation/promote_when_base_missing) =Yes(the default) lets a good new photo become the main image when the old main image file is no longer on your server. See "When the main image file is missing" below.
Draft retention is not on this screen. Unreviewed image drafts are kept for 30 days by default (
moogento_productcontent/image_generation/draft_retention_days, clamped 1-365); change it withbin/magento config:set moogento_productcontent/image_generation/draft_retention_days 14. - Generate product images (
-
Go to: Stores > Configuration > Moogento > ProductContent AI > Content: Images & copy
-
Set your image style prompts:
- Style 1 image prompt (
moogento_productcontent/store_prompts/image_prompt_style_1) = the subject and how it should look, in one instruction (e.g. "The product photographed straight on, filling most of the frame, on a clean white background with soft professional studio lighting and a subtle shadow") - Style 2 image prompt (
moogento_productcontent/store_prompts/image_prompt_style_2) = a second look, described the same way (e.g. "The product in use in a bright, lived-in home setting, natural daylight from a window, shallow depth of field") - Style 3 image prompt (
moogento_productcontent/store_prompts/image_prompt_style_3) = an optional third look
- Style 1 image prompt (
-
Save Config.
-
In ProductContent AI > Products > Classic Products, select products and choose Actions > Advanced > Queue AI image generation. To do a single product, use Queue image generation in that row's own Actions menu.
Notes
- Images are new images that use your product photo as a reference, so they show your actual product. The automatic photo set requests five apparel views or three goods views, subject to your plan cap and the views already covered by usable gallery photos.
- Publishing a generated image normally adds it to the gallery. In improve mode an edited draft can replace its source gallery entry and inherit its image roles; the original file stays stored for rollback. A suitable new photo can also replace a missing main image, as described below.
- Your product photos are sent to the image and checking service to make and check images.
- Product shots show the product alone on one plain background, matching your photo's background when it is a solid colour and white otherwise. Lifestyle scenes show a model wearing or using the product. If your store's own photos contain a person, that person is reused in the lifestyle scenes. Otherwise a new model is created, and the same model appears in every lifestyle scene of that product.
- Each image style in a template has a Shot setting: front, back, side, on a model or lifestyle scene. Back and side views are made by AI from your front photo, so they are always held for you to review and never published automatically. With no template of your own, clothing gets a front, back and side shot plus two lifestyle scenes, and other physical products get a front shot, a back shot and one lifestyle scene. The two lifestyle scenes show the same person in clearly different settings, and snow and winter clothing stays in snowy settings in both. When editing template image rules, check the enabled styles, selected views and counts before saving; these depend on the rules or preset you start from.
- Each generated image is checked against your product photo. A draft that does not match well is retried once automatically. The retried version is kept as-is (no further retries).
- No duplicates: an image that repeats one of your existing photos, or another image in the same set, is dropped, and one varied replacement is tried. A cut-out that looks pasted onto its background is rejected the same way. Scenes in different settings are kept.
- Always create a new photo works from your product photo as a reference, so a new image is a fresh photo of your real product rather than an edit. Without a usable photo it only generates for a generic item (no brand or manufacturer code, and not recognised as a named product). A branded product with no photo is skipped, and the review screen says to add a product photo and regenerate.
- Product shots and on-model studio shots share one background colour, taken from your own studio photos even when they show a person or have side bars.
- Generated images are stored in
pub/media/moogento/productcontent/drafts/until approved. - On Growth and Pro a maximum of 6 images per product can be held at once (across all statuses: reserved, draft, approved, applied). On Seed the cap is 1.
- The module's SKU exclusion guard prevents the product SKU from appearing in any image prompt, which keeps prompts compliant with most provider terms.
When the main image file is missing
Sometimes a product's main image points at a file that is no longer on your server, for example after a media folder move or a failed import. Shoppers then see a placeholder instead of a photo. ProductContent AI notices this and no longer counts the missing file as the product's front photo. The next image run can then make a front photo, if your template asks for a front view and no other front photo in the gallery already covers it.
With Use a new photo when the main image file is missing set to Yes (the default), a good new photo becomes the main image when you publish it:
- Only front, side and on-model photos qualify. Back views, lifestyle scenes, photos that failed the photo check and store photos resized to fit your template never become the main image this way. Neither do brand photos found by research. You can still click Use as main image on any of them.
- The file must be confirmed missing twice: once when the image run makes the photo, and again when you publish it. If the file cannot be read for some other reason, or has been put back since, the main image is left alone.
- A main image you chose yourself, whose file is on your server, is never replaced.
- When you publish several photos from the same image run, the best view ends up as the main image: front first, then side, then on-model. A later image run never replaces a main image an earlier run set, because you may have chosen that photo yourself since.
- At most 25 main images are replaced in one publish request or one background run. A photo held back by this limit, or because the store view's image settings could not be read, is not published: you see a message, nothing changes on the product, and the photo stays ready to publish again.
- The setting is per store view. With it set to
No, or on a plan that does not include image generation, no photo replaces the missing main image automatically. Missing files are still reported in the workspace and the Next action column, and the notice suggests uploading the file again or choosing another main image. Use as main image on a draft still makes that photo the main image. - Rolling the photo back puts the previous main image setting back. A main image, small image or thumbnail you have changed yourself since is kept.
Missing files also move to the end of the gallery the next time a publish rearranges it, and ProductContent AI never makes one of them the main image. On the Products & Drafts grid, the Next action column names image problems such as Restore missing image files or Replace the placeholder image instead of suggesting a new product page.
In the workspace. When you open a product in the workspace, a notice headed Image files are missing from the server names the missing main image file, or counts the missing gallery files, and says what you can do: publish a front, side or on-model photo, upload the file again, or choose another main image. Missing files show as broken thumbnails in the gallery until you hide them:
- Hide missing files hides the gallery entries whose file is confirmed missing, in the store view you are working in. A file that holds the main image, small image or thumbnail is never hidden.
- Show hidden files again brings back the files this action hid, with the visibility setting each one had before. A file you have already shown yourself is left as it is. ProductContent AI does not remember who hid a file, so one you showed and then hid again yourself is shown again too.
- Both buttons need the Apply Generated Images permission. Admins with that permission see the notice even without access to draft review.
Fit your existing photos to a template canvas
Use this when your gallery contains useful photos in inconsistent shapes or sizes.
- Choose a canvas size in the product's template image settings.
- In the classic Products grid, open the product row's Actions menu and choose Fit store photos to template size.
- Open Review product and review the fit proposals under Images. Publish the ones you want or reject them.
Fitting uses local image processing and does not spend AI image allowance. It can remove plain padding, add a matching canvas and enlarge a small photo within a two-times limit. A photo that cannot be fitted safely can be left unchanged. Nothing publishes when you request the fit. Applying a fit keeps the original file for rollback; use the image's Rollback action to restore it.
Hide gallery images whose file is missing
Some products keep a gallery entry after its image file has gone from the server. Shoppers then see a broken thumbnail. ProductContent AI hides those entries for you after it publishes images for the product. Nothing is deleted: the entry stays in the product and you can restore it.
How to set it up
-
Go to: Stores > Configuration > Moogento > ProductContent AI > Content: Images & copy
-
Set Hide gallery images whose file is missing (
moogento_productcontent/image_generation/auto_hide_missing_files) =Yes(the default) orNo. -
Save Config.
What gets hidden
- Only entries whose file is confirmed missing from the server's media folder. If the folder cannot be read, nothing is hidden.
- Never an image that is the main image, small image, thumbnail or swatch of the product.
- At most 5 images per product in one run, and never more than half of the product's gallery entries.
- Automatic hiding does nothing when Magento keeps media in remote storage.
- A product where half or more of the gallery files are missing is skipped, because that usually means a partial copy of the media folder rather than lost images.
When images were hidden, the review panel says how many were hidden automatically and names the files, with a Restore button. Restore checks each file again. A file that is back is shown again. A file that is still missing stays hidden, and Restore anyway shows it regardless. A restored image stays visible unless its file comes back and then goes missing again. If you turn the setting off, the panel keeps its Hide missing files button, so you can still hide missing images yourself.
Notes
- Turn the setting off when your product images are served from another server, a CDN, or a copy of the live site. Files can look missing to this server when they are not, and a copy of the live site often has no media folder at all.
- The same actions are available from the command line, per product (
--storepicks a store view,--jsonprints JSON):php bin/magento moogento:productcontent:images-missing 123lists the missing and hidden files with their state and who hid them. Use--all --limit=100to scan many products, and--after=IDto continue.php bin/magento moogento:productcontent:images-hide 123 --dry-runshows what automatic hiding would do. Without--dry-runit does it, within the same limits. Add--manualto hide the missing files even when automatic hiding is off (it still refuses under remote storage unless you add--force).php bin/magento moogento:productcontent:images-restore 123restores every hidden file that is back on the server. Add--file=/a/b/photo.jpgto restore one file,--forceto restore files that are still missing, and--dry-runto preview.
Configurable products and their options
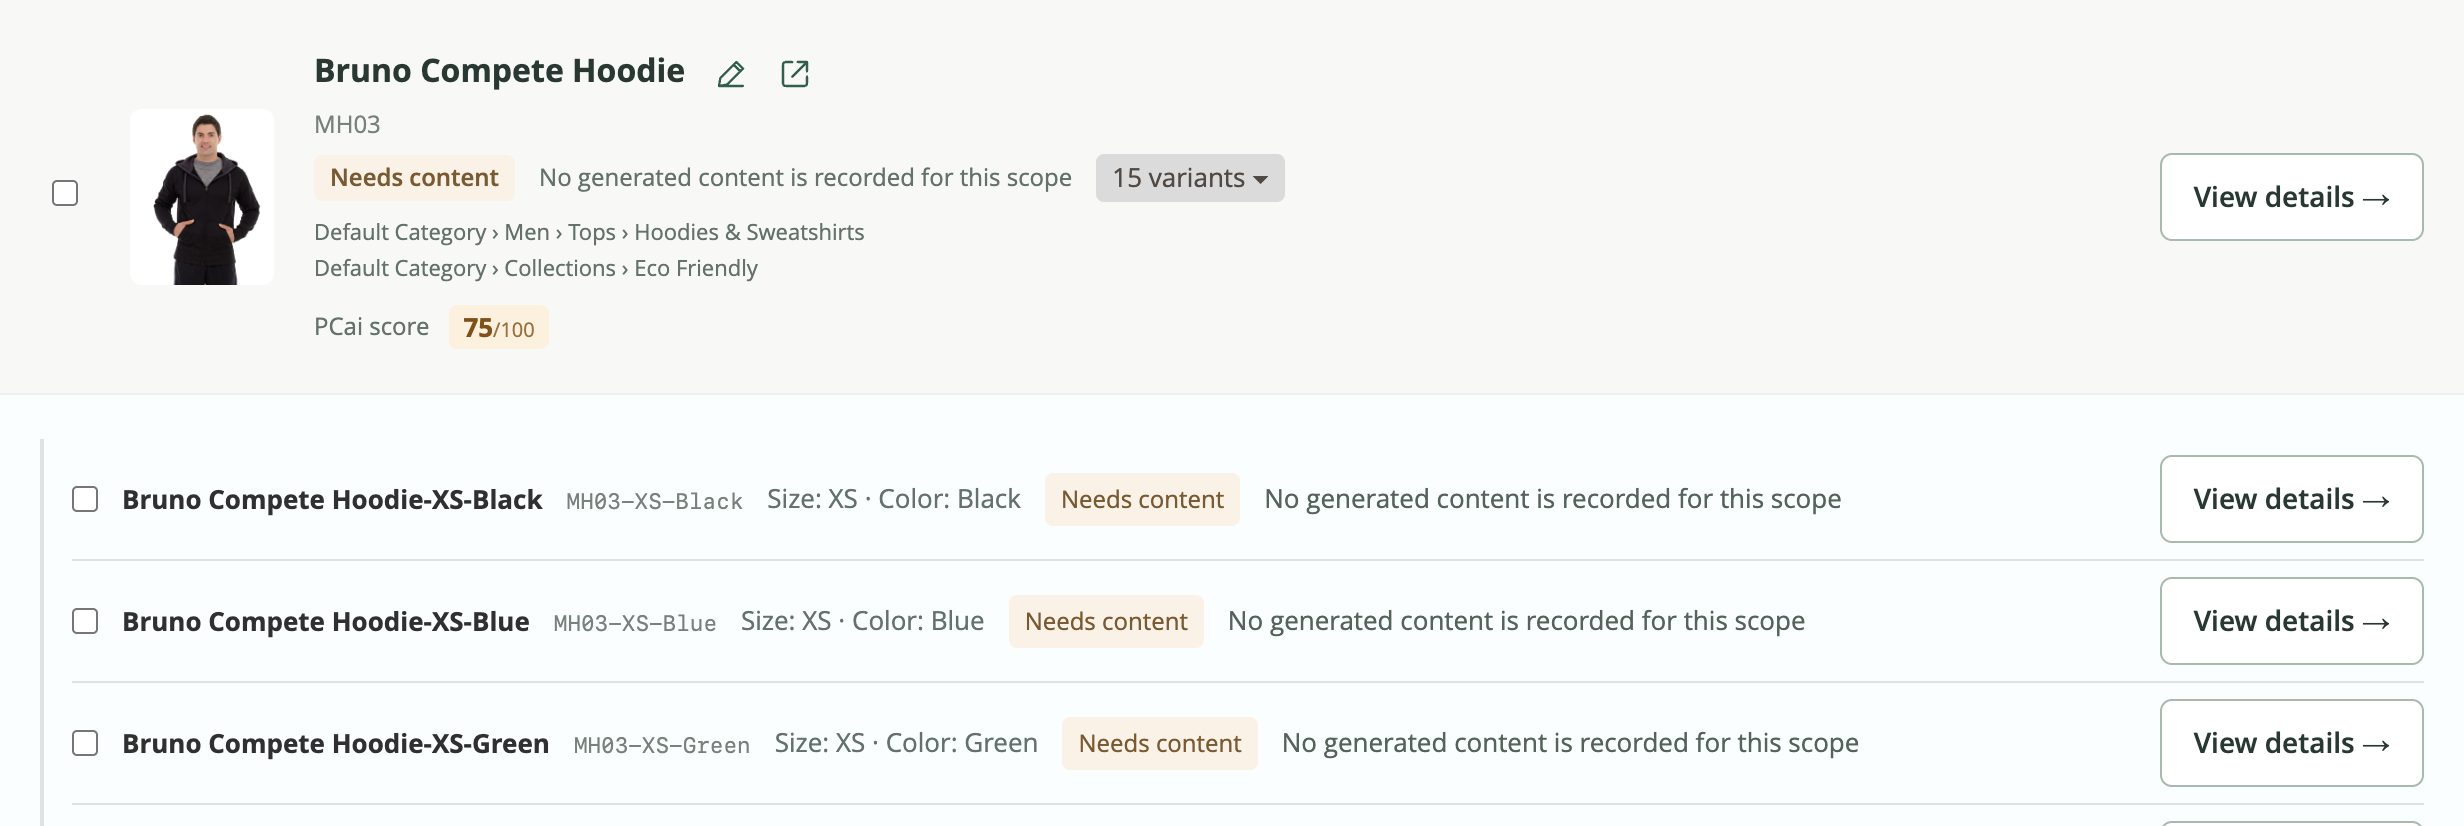
In the workspace, a configurable product's row shows an N variants tag. Open it to list each option (for example each size or colour) with its own checkbox and status. Options with proposals show Review product; an option without proposals shows View details. Review and publish an option the same way as its main product.
Generate at the main product. With Generate options on their main product and Write copy on the main product only enabled, starting generation from a hidden option that belongs to one configurable product routes the work through that main product. This avoids a separate content generation for every size. Options with their own product page generate normally. With Generate images per colour, PCai creates an image set for each colour and offers it to the sizes in that colour. Check the image proposals for each colour before publishing. Selecting the main product also selects its displayed variants; untick any options you want to leave alone.
Option names. PCai writes each option's name from its main product's name and the option's own choices, for example "Autumn Reserve 3L Pant for Men in Black, Size LARGE". You never need to rename options yourself: when their names do not say their size or colour, PCai drafts new names and the row shows Variant names: N ready to review. Each option's name draft appears as its Page title in its review and, unlike other visible names, is ticked to publish by default, so Approve + publish on ticked options publishes their names too. This is controlled by Name options after their main product in the settings; with it off, the row only notes that the names do not say their choices.
Option photos. An option with no photos of its own is offered its main product's photos, or, for a product that comes in several colours, the photos of another option in the same colour. They appear in the option's review under Images, labelled Photo reused from the main product or Photo reused from another option in this colour, and are published like any other photo. These are copies of photos you already have, so they cost nothing. A photo you publish on the main product later is offered to its photo-less options too. An option that already has photos you added is left alone, and a photo is never offered twice, even if you rejected it. This follows Generate images per colour.
Option attributes. When an option leaves a colour or size attribute empty, PCai suggests the option's own value: its own size or colour choice, its main product's value, or a colour its main product's name states. The value is matched to one of the attribute's existing choices by its exact name, so a very long list of choices (such as thousands of colours) is fine. When several choices share a name, PCai picks the one the main product uses, then the one most of your products use. When the main product's name states more than one colour, the last one counts. Only attributes you turned on for suggestions are used, never the attributes shoppers choose between, and an attribute that already had a suggestion on that option is left alone. These suggestions cost nothing.
PCai catches up on options of products it has already drafted every 15 minutes. To run it now for one product, use bin/magento moogento:productcontent:variants:catch-up --product-id=<id> (add --store-id=<id> for a store view; the default is All Store Views).
Product workspace
Open ProductContent AI > Products and choose the store view you want to work on. The workspace brings copy, images, attributes and progress together for each product. Your permissions determine which review and publishing controls you can use. The classic Products grid also links to the workspace.
- Choose a store view before selecting products. All Store Views is a deliberate default-scope choice; a store view with its own saved values can still override those defaults.
- Search by name or SKU, or choose a status count to narrow the list.
- Click Review product to compare the saved original with the proposed copy. Tick only the fields and images you want to publish. Check the selected store scope and any warning about store-specific overrides.
- To revise a field, open its speech-bubble Request changes control, enter your notes, then choose Submit changes in the footer. Choose Skip for now to leave the proposals waiting, or Approve + publish to write the selected proposals. Closing or skipping the review does not publish it.
- Use the next-product controls to continue reviewing the list without returning to the grid.
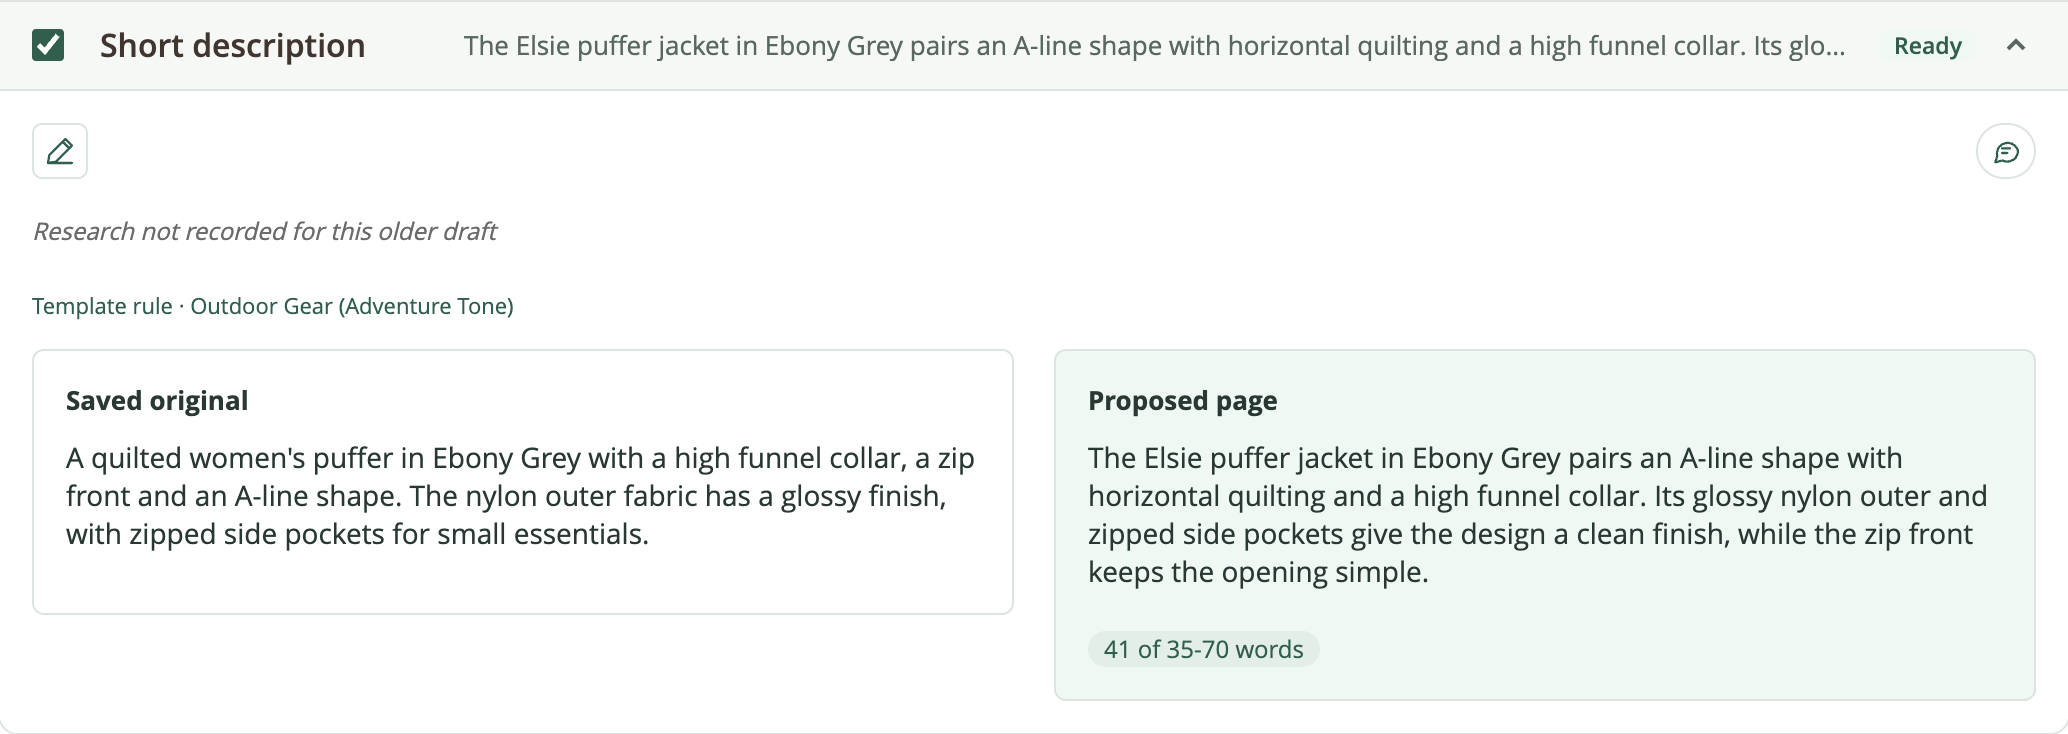
Image files missing from your server have their own notice and buttons, described in "When the main image file is missing" above. Select a specific storefront before opening a public product link. Use Classic Products to go back to the full Products & Drafts grid and its normal actions.
Products that are disabled in the selected store view (or in every store view, at All Store Views) are left out of the workspace list and its counts, and generation is refused for them, including from the Products grid; tick Include disabled products beside Show variants to list them and generate for them anyway.
The workspace search finds your words anywhere in the product name or SKU, ignoring capitals: "jacket" finds every product with jacket in its name, and several words such as "burton gore-tex jacket" find the products whose name contains each of them in any order. A full or partial SKU also works.
Activity
From ProductContent AI > Activity, view a timeline of all generation and review activity in your store. The panel groups activity by product and shows each generation or review attempt with its outcome.
Filter activity by tabs:
- All runs - every event in the trailing window
- In progress - jobs currently being processed by cron
- Needs attention - attempts that failed and are awaiting retry, or that encountered warnings during review
- Complete - successfully finished attempts
Each row shows the product name, timestamp, and outcome summary. Click a row to open that product's review modal and retry failed fields or adjust proposals. Use the Refresh button to reload the latest activity, or Load more to show older events beyond the current page.