shipEasy Quickstart
 Most of this 'basic setup' is included if you get the Installation & Setup Service
Contents
Aims & Preparation
Let's get shipEasy up and running in a couple of minutes.
If you don't have it installed yet, follow the Easy Install Guide to get shipEasy running.
Column Display & Ordering
Head to the SystemConfig > Moogento / shipEasy and find the Grid Columns Setup. It's probably good to have the SalesOrders page open on another window. Then go through and remove/add/reposition the Magento order columns to suit your store and way of working. You will likely tweak this over the next few weeks, so just get the obvious ones now.
Store Logos
This really helps get a quick visual overview of where the orders are coming from. When this is enabled you'll see your store logo(s) in the Magento Orders page.
- Load, into Photoshop or equivalent, the logo image template which came with your extension zipfile > _sample_images / sample_website_images /Template_website.psd.
- Grab your logo, ideally a vector image.
- Copy that and paste into the template file. You'll need to resize this to fit in the template.
- We've also got some standard logos, premade in the same sample images folder (eg. eBay).
- Save this as a transparent png-24 file.
- Head back to the shipEasy config > Grid Columns Setup -> Store set Replace with image > Yes, and then upload your images for each store.
Order Flags & Custom Attributes
Quickly and easily set meaningful flags on orders, direct in the Magento Orders page. A flag can be an image (including custom ones), preset text, custom text, or the current date. A flag can be set, in conjunction with pickPack, when you create a PDF (eg. you can show 'printed' so that you can easily keep track of where each order is in the processing line).
- First up, find the custom columns and turn them on. We've pre-filled some values to get you going fast.
- In shipEasy Config > Grid Columns Setup find Custom Attribute 1 and turn it on.
- For flags you can use:
- Preset images:
- Just include any of these:
{{flag_red.png}}{{flag_orange.png}}{{flag_green.png}}{{flag_grey.png}}{{flag_shipped.png}}{{flag_checkered.png}}{{flag_alert.png}}- in this format:
Red Flag|{{flag_red.png}}- (In this example
Red Flagwill show as the dropdown option, and the red flag image will show in the Orders grid.)
- Custom images:
- Save .png images in skin / adminhtml / default / default / moogento / images / flag_images /
- If you're using a custom admin theme you might need to duplicate that folder structure and files into your theme.
- Use that filename in this format:
Custom Flag Text|{{custom_flag_image.png}}- (In this example
Custom Flag Textwill show as the dropdown option, and the custom flag image will show in the Orders grid.)
- Custom text:
- Enter in this format:
Custom Text|#FFFFFF- (In this example
Custom Textwill show in the orders grid on a white background (#FFFFFF= hex code for white).)
- If you're not sure about hex codes, check here.
- Preset images:
Shipping Addresses
This is one the great missing features of Magento, if you ship physical products. Now you can see the full shipping address of each order, before printing and processing, check for address problems, and help sort orders.
- shipEasy Config > Grid Columns Setup / Name column > Show Address? set to Yes and you're away.
If you ship to multiple countries, may as well turn on the country column while you're here. This will show a filterable country flag column.
Tracking Orders
shipEasy can help with administering tracking for your orders.
- On the SalesOrders page
- Enable the tracking column,
- Select each order,
- Enter the tracking info,
- Choose sE Ship / sE Ship & Invoice
- Submit
- Via importing a .csv
- Setup the .csv columns in SystemConfigShipEasy > Import Shipments by CSV : make sure the first line of your .csv has these values.
- Check the sample .csv file.
- On the SalesOrders page, click Import Shipments
- Select your .csv file to import
- Choose the actions that you want to happen.
- shipEasy is pretty powerful here, you can choose multiple actions, like setting a custom shipEasy attribute, choosing whether or not to email the customer, etc.
- If you're not sure what to choose sE Ship & Invoice will ensure that it processes all orders (even if an order is not Invoiced, it will Invoice and then Ship it).
- Run Import
- Setup the .csv columns in SystemConfigShipEasy > Import Shipments by CSV : make sure the first line of your .csv has these values.
If you want to show custom carrier images and tracking links, check Setup Carriers for Tracking as well.
Setup Carriers for Tracking
Aka. showing a nice logo for each carrier, and auto-setting the carrier based on the tracking code.
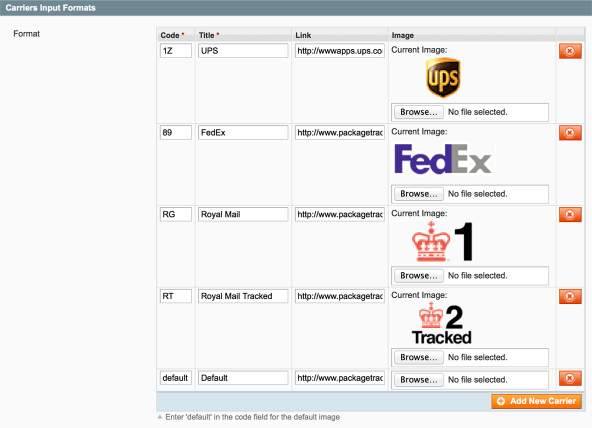
- Head to Carriers Input Formats.
- The idea is to set each carrier that you use, and repeat for each format of tracking number that they use.
- Enter the first few characters for each carrier's tracking in Code : this will be pattern-matched, eg.
1Zwill match1Z128734234282. - Enter the name of this Carrier in Title
- Add the tracking URL for this carrier, replacing the section where the tracking number would go with
#- Eg. UPS is
http://wwwapps.ups.com/WebTracking/processInputRequest?AgreeToTermsAndConditions=yes&loc=en_US&tracknum=#&Requester=trkinppg
- Eg. UPS is
- Upload an image for this Carrier
- We have some common carrier images prepared zipfile > _sample_images / sample_carrier_images
- If a carrier has multiple tracking number formats, make a new entry for each.
- The idea here is that once setup, you're saving 3 clicks per manual entry, as no need to select the carrier after entering the tracking number.
Out-of-Stock Items
Very handy this, how you use it will depend on how you run your store, but essentially you can quickly see orders which have out-of-stock orders in.
You could use this:
- With pickPack to print 'Out-of-stock' PDFs or CSVs, to order more items.
- As a double-check against 'never out-of-stock' product-lists.
- As a marker for when stock levels reach a certain level, to know when to re-stock.
- Choose your settings here : shipEasy Config > Grid Columns Setup / Product name column + Sku Column
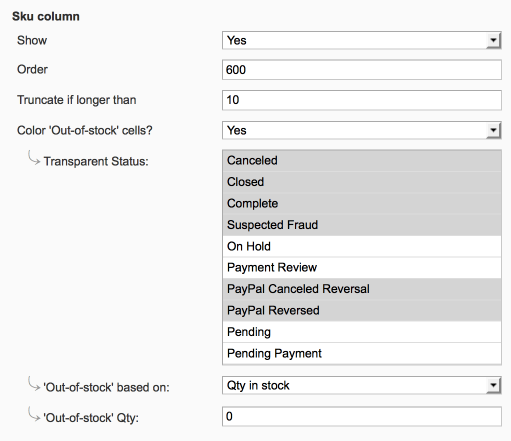
- "Transparent Status" is a multi-selectable box of statuses which you don't want to see stock status for.
- To keep things minimal and remove distracting elements, I'd only show status on current orders (no point seeing the current stock status for items which have been shipped).
Out-of-Stock Orders
You can see at-a-glance which orders are all in stock (or which have some items out of stock).
- Very handy to quickly get going with 'no-problem' orders, and leave the problem ones until later.
- You can filter to show only orders with all items in stock, and vice-versa.
- Choose your settings here : shipEasy Config > Grid Columns Setup / Stock column
- Same tips for transparent statuses as above apply.
- You can use different 'status is out' reasons for the different columns - eg. this column can flag up based on qty in stock, the sku flag could flag up based on the catalog 'stock status'. This can be a handy check for any backend shenanigans.
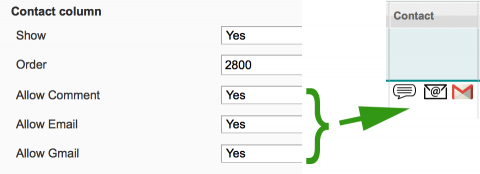
Quick-contact
This is a handy way to quickly contact a customer. You can set the options which show in the shipEasy Config > Grid Columns Setup, I'd turn off ones that you're not going to use:
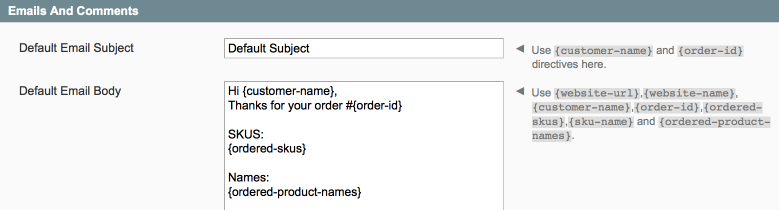
You can set the templated texts with quite a lot of auto-fill options available:
There are 3 options:
- Comment : this will pop-up a window with two options:
- Admin comment - whatever is entered here is entered as an admin-only viewable comment in this order.
- Customer comment - whatever is entered here is entered as 'viewable on frontend' and emailed to the customer.
- Leave blank to only enter an admin comment - nothing will be emailed to the customer or viewable to them.
- Email : This will attempt to popup a new email window, pre-filled with your template text, and the customer email.
- Gmail : This will attempt to popup a new specifically-gMail window, pre-filled with your template text, and the customer email.