Difference between revisions of "shipEasy Advanced Setup"
m |
m |
||
| Line 40: | Line 40: | ||
* ! Make sure that the last scan finished processing before your start on the next one. | * ! Make sure that the last scan finished processing before your start on the next one. | ||
* Boom, set the order status to 'shipped', email the customer their shipping confirmation email, and add a custom tag to the order (eg. tag all orders in a specific batch for each processing later on). | * Boom, set the order status to 'shipped', email the customer their shipping confirmation email, and add a custom tag to the order (eg. tag all orders in a specific batch for each processing later on). | ||
| − | * No barcode scanner yet? I'd recommend laser over CCD types, like | + | * No barcode scanner yet? I'd recommend laser over CCD types, like [http://www.amazon.com/gp/product/B006LVO56W/ref=as_li_qf_sp_asin_tl?ie=UTF8&camp=1789&creative=9325&creativeASIN=B006LVO56W&linkCode=as2&tag=moogento-20 this one]<img src="http://ir-na.amazon-adsystem.com/e/ir?t=moogento-20&l=as2&o=1&a=B006LVO56W" width="1" height="1" border="0" alt="" style="border:none !important; margin:0px !important;" />. If you're getting a wired (vs. wireless) one, check the length of the cable will be suitable for your setup. You can usually substitute longer cables. |
==Hide Un-used Options== | ==Hide Un-used Options== | ||
Revision as of 16:18, 16 April 2014
 Most of this 'advanced setup' is included if you get the Installation & Pro Setup Service
Contents
Aims & Preparation
We're going to activate some of shipEasy's more advanced features.
Follow the Easy Install Guide and the shipEasy: Quickstart to get shipEasy up and running.
We're going to be mainly focused on SystemConfiguration > Moogento / shipEasy and SalesOrders
Country Groups
We can create up to 4 groups based on countries. This can be used for:
- Grouping orders in Magento based on order status, for the 'Weights/Orders Bar', to have a quick overview of where your orders are heading.

- Turn it on here, and choose which order statuses will be counted:
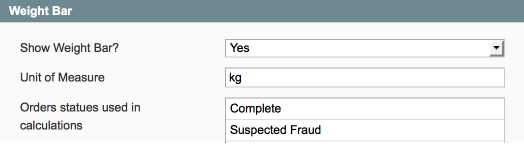
- Turn it on here, and choose which order statuses will be counted:
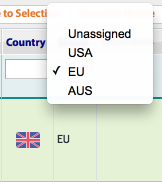
- To group by and filter by country group in the SalesOrders page.
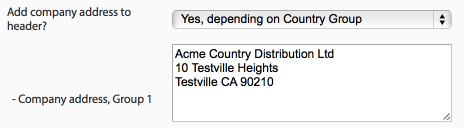
- In conjunction with pickPack to show specific return addresses / company addresses (per store) based on the country group.
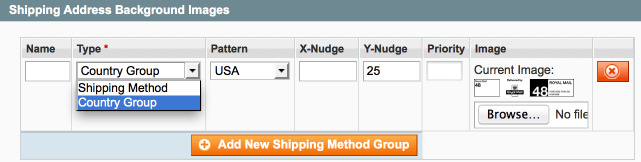
- In conjunction with pickPack to show specific shipping labels based on the country group.
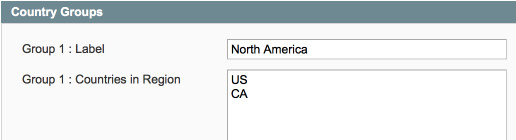
Ok, let's set these up. Head to the Country Groups section.
- We've pre-filled some standard options, and listed some common groups to make it easy to copy/paste.
- Here I've made a group 'North America' and added in Canada and the USA.
- Common groups are usually based on shipping rate or carrier, or to help with marketing info:
- Home country
- Home country group
- Specific other country group
- Rest of World
Order Barcode Scanning
Ok, are you ready to save yet more hours every single day, reduce mistakes when shipping and processing orders, and generally feel like a bit of a rebel with a gun in your hand?! Ok, it's a laser (barcode-reading) gun, and the bonus is that this makes order processing so easy, so pain-free, that you can easily train someone else to do this (so you won't be holding the gun!).
- Use in conjunction with pickPack, so the order IDs are printed as barcodes on the Packing Sheets / Picklists / address labels / zebra labels.
- Once this is turned on, back in the SystemOrders page you'll see a new button top right:

- Click this and a new section will slide open:
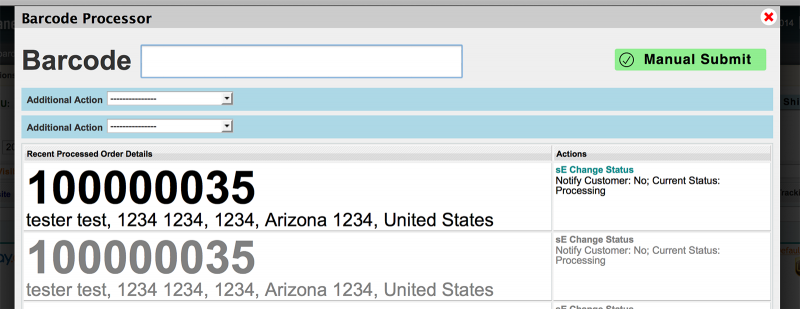
- You can set two actions (from a dropdown choice), which will be applied for each scan.

Activated via a nice and simple toggle:

- See an easy-to-read history below the scan box, to check you're not missing anything.
- Also shows which actions were performed.
- Just make sure the cursor is in the big text field, set the options, and you're ready to start scanning order barcodes in Magento!
- ! Make sure that the last scan finished processing before your start on the next one.
- Boom, set the order status to 'shipped', email the customer their shipping confirmation email, and add a custom tag to the order (eg. tag all orders in a specific batch for each processing later on).
- No barcode scanner yet? I'd recommend laser over CCD types, like this one
. If you're getting a wired (vs. wireless) one, check the length of the cable will be suitable for your setup. You can usually substitute longer cables.
Hide Un-used Options
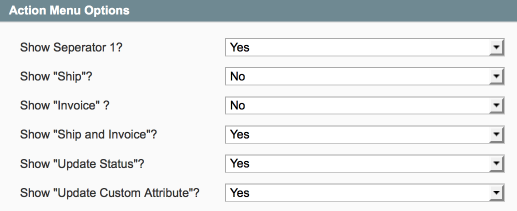
You'll probably realise that you just don't use some of the massaction menu options. Turn 'em off and de-clutter your dashboard!
- These are at the bottom of the shipEasy Config > Action Menu Options
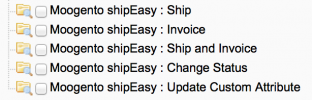
...From Specific Users
This is a great one, if you have multiple people accessing your Magento install.
- Reduce the chance of mistakes happening and restrict the shipEasy options to specific users.
- eg. you can hide the 'Ship & Invoice' option from the warehouse crew / accountants / etc.
- First edit the specific user role in SystemPermissionsRoles
- Then assign those roles to specific users in SystemPermissionsUsers