Installing Magento Extensions : Easy Install Guide
Revision as of 08:35, 12 March 2015 by <bdi>Moo</bdi> (talk | contribs)
Make sure you've gone through the Pre-install Checklist before starting!
Copying the files
- Unzip your extension package.
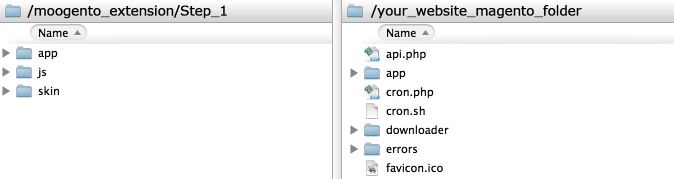
- Inside that package you'll see Step_1, open that folder inside your FTP app.
- Locate your website's Magento app folder in the same app. You should now have the contents of Step_1 on one side, and your main website folder (containing the Magento app folder) on the other side. Check that you see an app folder each side.
- Drag the folders from inside Step_1 into your remote site (the important thing here is not to drag on top of another folder, or the files will be placed in the wrong location - easiest is to drag onto a file or blank space on the remote side).
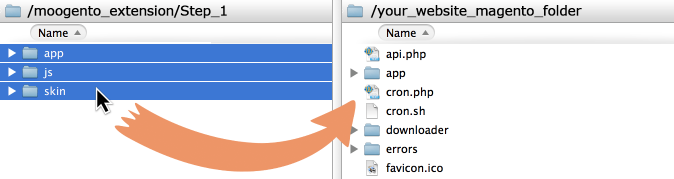
- You may be asked Merge or Replace? by your FTP app. Choose Merge for folders and Replace for files.

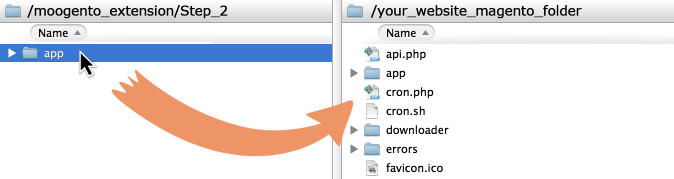
- When that has completed, open Step_2 in your unzipped extension folder.
- Using the same procedure, copy the contents of Step_2 into the same location in your Magento installation.
- If you're using a 3rd party admin theme, you may need to also copy the contents of skin/adminhtml/default/default folder into both skin/adminhtml/default/[skin name] and skin/adminhtml/go
- If you're installing pickPack and are going to be attaching fonts to your PDFs (eg. custom fonts or non-Roman characters), then, also using the same procedure, copy the contents of Step_Optional_Font_Pack into the same location in your Magento installation.
Clear the cache and assign user permissions
- Go to the SystemCache settings, and clear all caches (click Flush Magento Cache and Flush Cache Storage).
- Do this even if you have caching generally disabled.
- Log out then Log in.
- This will allow you to edit the config page for this extension (and avoid the 404 error).
- Head to SystemPermissionsRoles
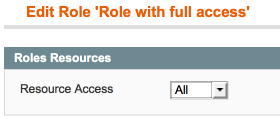
- Check that you have assigned the new Moogento Extension options to the appropriate roles, and save.
- If saving an admin role, likely you have 'All' resources set; just re-save this:
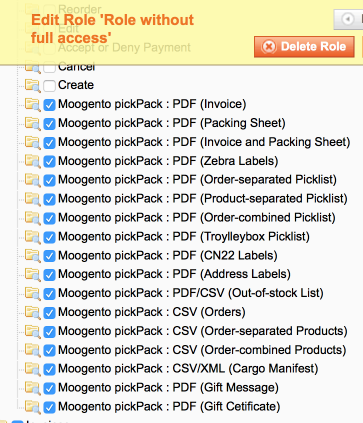
- If saving a partial access role (eg. granting pickers access to create Packing Sheets), find the new Moogento sections and grant as needed (eg. here is access to mass-action menu options):
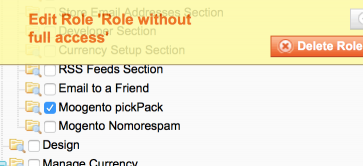
- Don't forget to set the access to the System>Configuration section if you need to:
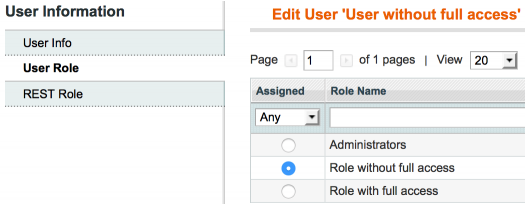
- Head to SystemPermissionsUsers
- Check that you have assigned the correct role (that we just granted the appropriate Moogento Extension options to) to the appropriate users, and save.
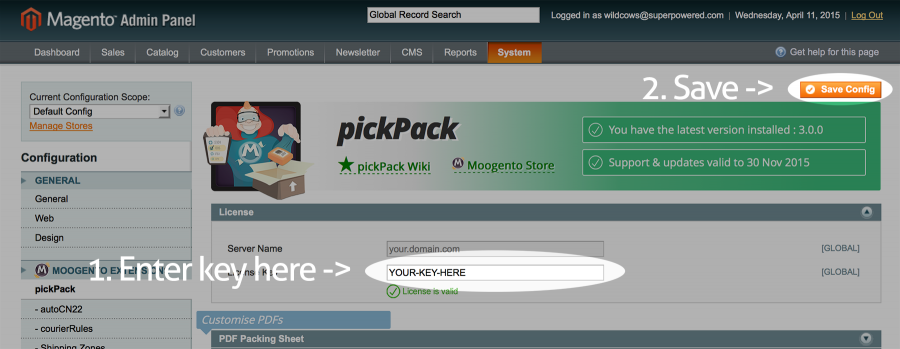
- Navigate to SystemConfiguration and then to the specific config page for your new Moogento Extension.
- At the top, if this extension requires a license key, enter your license key (this will have been emailed to you; you can also find it inside your Moogento account downloads section).
- Click the 'License' word to expand that section if it's not already showing the key entry field.
- Enter the key and save the page:
- Save this page.
- Check that it works at a basic level; this is also a good time to check your public store front. I would also make a test order at this stage.
- If everything is ok and you have previously disabled compilation, now you can enable it.
You should now be setup at a basic level.
If you have any issues, check the Troubleshooting guide.