shippingRules Setup
Contents
Aims & Preparation
Most of this is included if you get the Pro Installation & Setup Service
We're going to get into the main parts of shippingRules here, and have a quick look at setting up its options - both creating Shipping Zones and creating Rules.
Follow the Easy Install Guide to get shippingRules up and running - make sure that you're running a recent version of pickPack before installing shippingRules.
Creating Advanced Shipping Rules
The target is creating advanced shipping rules to suit your unique business. It's important to note that shippingRules works after the order has been submitted. The base idea is that, if the customer has paid for a specific shipping method, you may be able to ship it faster and/or cheaper with another method. Eg. if there's a local city courier that only accepts less-than-3kg packages, where there is no glass inside, you can make a rule to match that. If you want to 'beat' that rule, eg. by saying that 'anything under 30g gets sent with Royal Mail 1st class no matter what', you can also accomplish that.
shippingRules works really well with m2Epro, which can create around 150 shipping rules - but which Magento registers as 'M2ePro shipping'. You can group rules by country, and then sub-group by selected shipping method - eg. send all registered packages to France by UPS, but all registered packages to Berlin by DFS. If there's a high-value order you can set it to always go by registered post, and if there is an order with items bought through a coupon or promotional offer you can override express shipping.
Basically this removes all those postIt notes you've given your packing staff, and mental notes you've given yourself, and general 'post it and hope it's the best value' actions, and gives you repeatable, useful actions that are correct every time.
In short - it's extremely customisable, and will end up making you, you staff, and your customers happy - orders will go out faster, with less mistakes, and will be delivered faster and at a lower cost.
Shipping Zones
Once set, you can use the shipping zones as options in pickPack and shipEasy as well.
It's not a bad idea to set shipping zones before making the rules - that way you'll have the zones available when you get to creating your Rules.
We'll be setting these in SystemConfigMoogento > - Shipping Zones
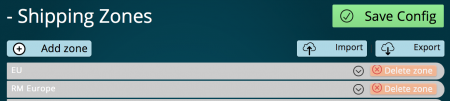
Setting Shipping Zones
- Click Add Zone to make a new blank zone.
- You can give each zone a name to help you remember what it's for. This label will be used in a few places (eg. in pickPack and shipEasy sections) so make it something memorable.
- Add each country for that zone. This can be a single country, or multiple countries. Start typing and it will auto-fill the country name.
- Add a zipcode for this country. This is optional. Use this for instance if you have a local courier that can deliver to certain postcodes faster/cheaper than another carrier. Or, maybe you want to hand-deliver local parcels.
- Repeat until you've set up all the various zones that you want to use in your rules. You can use these zones to filter with in the Orders Grid (using shipEasy columns), so bear that in mind.
- Save. Done.
- Eg. here we've setup a local area zone for Hollywood, but only for the 90210 zipcode:

Importing & Exporting Shipping Zones
You'll see an Import and Export button. You can use these to export your saved zones, or to import zones.
We've included a sample set of shipping zones in the extension zip folder : look for cr_zones.csv
You may find it easier to edit that file in a spreadsheet app, then import it here (instead of setting up each rule inside the Magento config).
Showing Shipping Zones in the Orders Grid
If you have shipEasy installed then you can show the matching Zone for each order in the Orders Page, as well as filter orders by those zones.
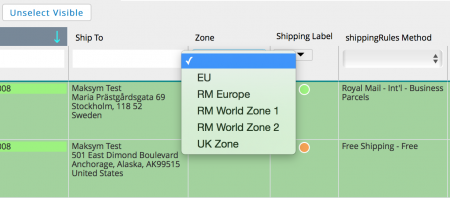
To do this you need to first select which Zones to show, inside the config section: SystemConfigMoogento > shipEasy -> Shipping Zones
Here we've selected all available zones:
Once you've saved that selection you'll have the zones showing up in the Orders page.
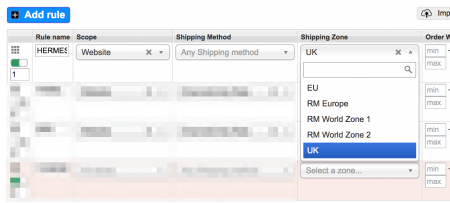
Using Shipping Zones in the shippingRules Rules
For the zones to be available as a filter inside the shippingRules rules, first you need to install shipEasy and select the zones that you want to use as a filter as per the previous section.
Then set the filter via the 'Shipping Zone' dropdown inside the appropriate rule:
If you want to use that filter in previous orders, don't forget to click 'Process all previous orders' inside the shippingRules setup.
Shipping Method Rules
After making your first few rules, try exporting the rule to a spreadsheet app - you may find it easier to make multiple rules there.
Setting Shipping Method Rules
- Click Add Rule and add in filters to suit.
- Add another rule.
- Drag'n'Drop rules in order of priority : The first rule to match (starting Priority=1 going to Priority=2 etc.) will match.
- Save.
Set Custom Attributes as Filters
You can include up to 3 custom product attributes in a filter.
* Maybe a specific courier won't take glass items. * Specific items you want to always ship a certain way (eg. shipping yourself from your local Post Office).
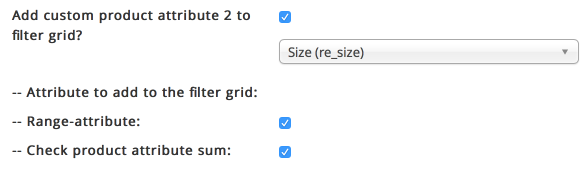
- Tick 'Range-attribute' to get a Range filter option (ie. 'from, to' value).
- Tick 'Check product attribute sum' if you want to count the sum of this attribute for all items in the order.
Eg. use this for total weight, total value, total dimensional weight, etc.
Assign Tracking from a Pool
- You can set each rule to specifically assign tracking number from a specific named pool of tracking numbers.
- You can make unlimited pools.
- Each number is used once, and you can be notified when each pool is close to being empty.
- Go to the 'Tracking Pool' section int he Config.
- Add as many different pools as you like.
- Save.
- Back in the Rules Setup, you can now choose any of your new Pools in the 'Assign tracking' section of each rule.
You can use this to eg. assign tracking to each type of shipping that you make, using number assigned to you by the courier. You can then combine this with pickPack, to print the tracking number ad its barcode on each package, eg. as a zebra label or in an Integrated label.
Importing & Exporting Shipping Method Rules
You'll see an Import and Export button. You can use these to export your saved rules, or to import previously-saved ones.

We have included a sample set of shippingRules Shipping Rules in the extension zip folder : look for cr_rules.csv
You can import these either direct or via editing in a spreadsheet app to save you time.
Manual Rules Processing
shippingRules will process your orders manually by two methods:
- Select the order(s) in the Sales>Orders grid, and choose mass-action 'cR Process Rules'.
- In the Order Detail page, you'll see a new shippingRules section, click the 'Process shippingRules' button to (re-)process this order.
- You'll also see the history if this order has been processed, and which rule matched.
Automating Rules Processing
Get all your orders processed automatically:
- Make sure your Magento cron is running normally.
- Click the 'Settings' title, to open that section up.
- Select 'Auto-process new orders with cron?'.
- If you want to be notified of Order which don't get matched by the rules, choose 'Log processed orders? = Yes'.
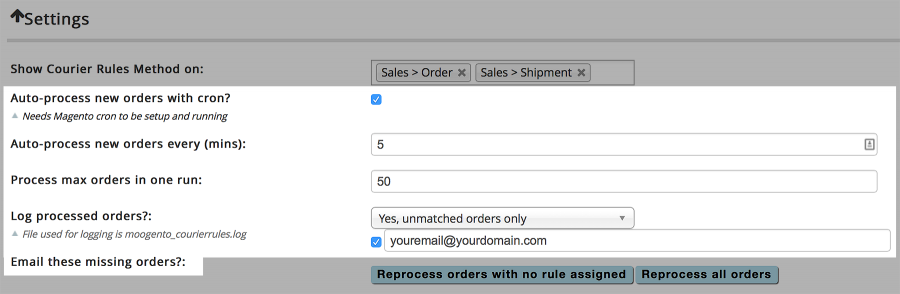
Reprocessing Orders
If you've been main changes to your rules you may want to reprocess old orders. This can take a while - we limit the number of orders we process each time, to save the server. You can either process all orders again, or you can process only those orders that have not previously matched a rule. You'll see a button for both options in the Settings.
Final Result
Here's some examples of the kind of rules that you can create.
